
Construction Software Demo Checklist: What to Test Before You Say Yes
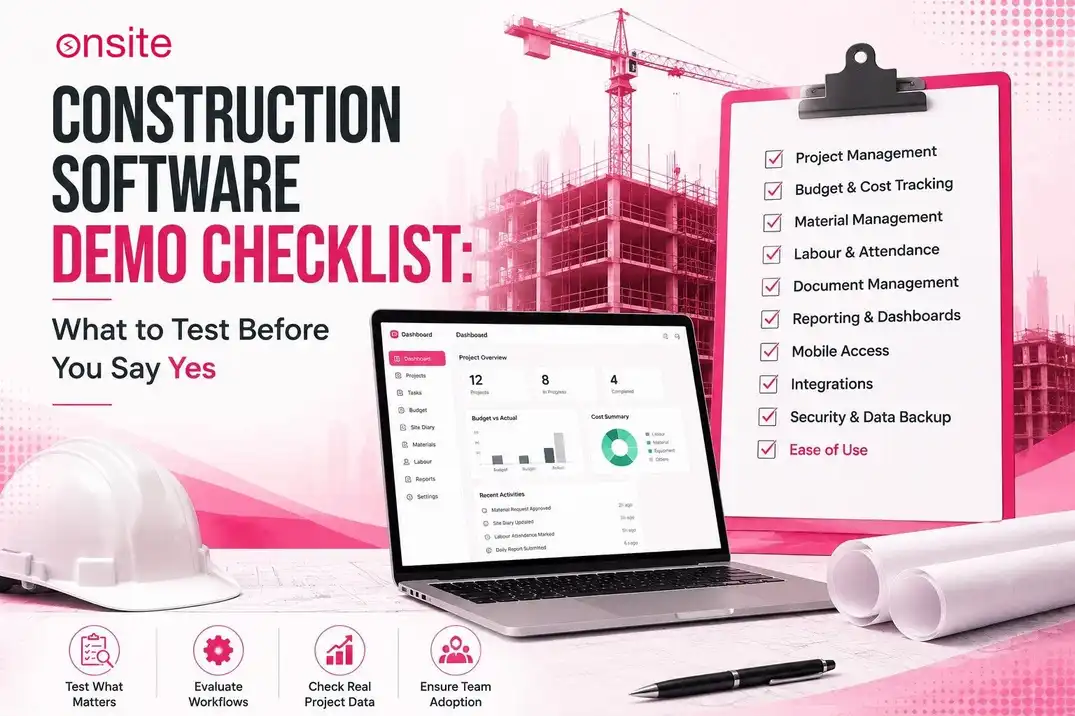
Construction software demonstrations are carefully prepared and presented. The person giving the software demonstration knows the data, the workflow, and exactly what to click on. The dashboard looks clean. Reports are generated in seconds. The mobile app opens without hesitation. Everything runs smoothly. In a sixty-minute call, a contractor leaves feeling that the product can do everything and that all the problems will be solved. You somehow forget about a construction software demo checklist even if you have prepared.
But a real construction project does not look like this. On a real construction project, the BOQ has 349 items and was built in an old version of Excel. A site engineer may forget to submit Tuesday’s DPR, and that day’s data still has to be filled in. There may be multiple pending approvals waiting to be approved. There is a lot of chaos on a construction site and in its management.
The software is expected to handle all of this real-world complexity. That is why it should be tested in real situations, not just against the scenario the vendor configured before you walked into the room.
A construction software demo checklist does not ask whether the software has a feature. It asks whether the software can handle real project problems, real workflows, and real data without requiring someone to guide every step.
What is a Construction Software Demo Checklist?
A construction software demo checklist is a set of questions and tests that a contractor asks or performs during a software demonstration to make sure the system can handle real construction workflows. It ensures that the software is not just something shiny presented during a demo, but a platform that can handle the real, messy nature of a construction project.
The checklist helps differentiate between software that looks good under controlled conditions and software that can actually work when a site engineer is managing a project in real time on a construction site.
Why Most Construction Software Demonstrations Look Better Than Real Projects
Understanding why demos look impressive is the first step to knowing what to push beyond in your evaluation.
Demo data is clean and complete. The representative has created a project with a BOQ of twenty line items and neatly entered quantities into perfectly balanced budgets. But the actual BOQ on a construction site is not limited to twenty line items. It may contain 340 or more. The BOQ can come from different sources. Some sections may have been inherited from a contractor who left six months ago. Some entries may only make sense to the person who originally prepared them. There is almost always at least one section that has not been updated since the project scope changed.
Every workflow has already been configured. Approval sequences are set up. User permissions are assigned. Material categories are pre-populated. The vendor has done the configuration work before the demonstration so none of it shows up as a question during the demo. On your actual project, all of this configuration has to happen before the system can be used.
Nobody is missing information in the demo. Every approval comes instantly. Every document is attached, and every quantity is confirmed. Everything is neat and quick. However, on a real construction site, a site engineer may submit a DPR without photographs. A material request may remain pending because the finance manager is on leave. A subcontractor’s measurement may be overdue by a few days. Real projects contain missing information, delays, and incomplete records. The software should be able to handle these situations just as well as it handles perfect data.
There are no real users in the demonstration. You are getting a demo from someone who has been doing it every day, has used the software for years, and knows every shortcut. Meanwhile, your site engineer uses WhatsApp for everything and may have never used construction management software before.
The gap between a demo environment and a live project is where software fails. The construction software demo checklist closes that gap by testing the software in conditions that resemble real construction, not ideal ones.
Before the Demo Starts: What to Bring
The majority of business owners and contractors attend software demonstrations empty-handed and simply go along with whatever the vendor is showing. This gives the vendor complete control over what is demonstrated and what is sold. Prepare yourself before attending a demo. Bring your own checklist and use it to test the software against your actual requirements rather than relying only on the vendor’s presentation.
Bring your own BOQ: Bring the real BOQ from an active site or a completed project, exactly as it exists, even if it is messy or poorly formatted. Ask the vendor to import it into the system during the demonstration. If the import happens smoothly and the BOQ works correctly after import, the BOQ structure is flexible and built for construction projects. If it cannot handle your actual BOQ, it is probably not the right choice.
Bring one real project: Keep a specific project in mind, whether it is the hardest one you have faced or the easiest one. Ideally, choose a project that is currently active. You should know its scope, current progress status, pending material requests, and outstanding subcontractor bills. Instead of looking at the prepared project used in the demonstration, ask the vendor to start with your project and use it as the scenario for the demo. This will show you how the software handles real construction workflows rather than a preconfigured example.
Bring your procurement process: Bring your actual procurement process. Be clear about the current material request and approval workflow. Who requests the material? Who approves it? Who raises the purchase order? Who confirms the delivery? Ask the vendor to demonstrate this specific workflow rather than showing only the platform’s default procurement process.
Bring a decision-maker and a site engineer: Bring the people who are actually going to use the software on site. A business owner or decision-maker can evaluate whether the system can run the business effectively. A site engineer can evaluate whether it is practical to use in day-to-day site operations. Both perspectives are essential before making a decision.
10 Things Every Contractor Should Test During the Demonstration
Test 1: Create a Daily Progress Report
Ask the vendor to create a DPR: For the project you have brought, ask the vendor to create a DPR using only the mobile app, without using a laptop or desktop browser.
During this process, observe how many steps it takes, how long it takes, and whether the format satisfies all your requirements. Can it show the work completed, labour count, material used, and photographs? Can photographs be added directly from the phone camera?
This helps you understand how time-consuming DPR generation is in the software. Does it take more than five minutes or less than five minutes? If the DPR can be created quickly with fewer steps, it is a good sign. You also need to make sure it captures real-time site data accurately.
Test 2: Import a Real BOQ
Ask the vendor to import your BOQ: Give the demo person your BOQ file and ask them to import it into the system during the demonstration.
Observe whether the vendor can import it directly or whether it requires reformatting. Notice how long the process takes. Check whether all the BOQ items are imported accurately with the correct descriptions, quantities, and units. Also see if there are any line items the system cannot handle.
If the contractor has to reformat the BOQ into a specific template before importing it, that is an additional manual step that introduces delays and increases the risk of errors. The BOQ import capability reveals how well the system handles real-world data rather than data that has been prepared specifically for the demonstration.
Test 3: Raise a Material Request and Follow It Through
Ask the vendor to demonstrate the procurement workflow: Ask the demo person to show you how to make a material request for a specific item. Pick the item from the project you have brought and follow it through every step. Raise a material request, review the approval, have them create the purchase order, record the GRN, and finally issue the material to the site.
Observe how many steps are involved in the entire process. Does the approval happen within the same system, or does it require a separate message or email? When the GRN is confirmed, does it automatically update the material balance and the project cost?
A procurement workflow that requires steps outside the system you are planning to purchase is not an integrated workflow. It is not built for a construction company that wants to manage its procurement process in one place.
Test 4: Record Labour Attendance from a Mobile Phone
Ask the vendor to demonstrate labour attendance: Ask the vendor to show you how labour attendance is recorded using a mobile phone. Ask whether the system supports face recognition or photo-based verification rather than manual entry.
Check whether attendance is captured at the point of entry or whether it has to be entered later by the supervisor from memory. Does the system capture a timestamp? Is the attendance immediately visible to the project manager?
If you are buying a software system, you should not have to continue making manual attendance entries that were previously recorded in a register. The software should help you capture attendance and maintain records immediately, without extra steps.
A system should record attendance at the point of entry using a photograph or face recognition. If it cannot capture attendance automatically and in real time, then it is not built for a construction site.
Test 5: Create a Variation Order
Ask the vendor to demonstrate a variation order: Tell the representative about a real variation scenario from the project you have brought. An ideal example could be a client asking you to change the floor tile specification on Level 2 from vitrified tiles to imported marble. The original rate was ₹55 per square foot, but the new rate is ₹220 per square foot, and the area is 840 square feet.
Ask the vendor to process this as a variation in the system.
Now observe whether the variation is linked to the relevant BOQ item. Is the cost calculated automatically? Can it be sent to the client for approval within the system? Once the variation is approved, does it automatically update the project budget and billing milestones?
This is one of the most important tests because it is also one of the most complicated activities in a construction project. It exposes more gaps than almost any other workflow.
A system that handles variations by simply creating a separate note in a comments field has not solved the variation problem. The entire process should be managed within the system automatically, without requiring manual work.
Test 6: Show Budget vs Actual
Ask the vendor to trace a material cost: Give the vendor a specific material, such as steel, and ask them to show how the budget versus actual figure for that cost category is calculated. It should not be just a dashboard number. The vendor should be able to show the underlying calculation of what was budgeted, what has been procured, what has been consumed on site, and what the current variance is.
Observe whether the vendor can trace the number from the BOQ line item through material procurement, site consumption, and the current balance. Or is it simply a dashboard number without a traceable source?
A dashboard number without a traceable calculation is only a reporting tool. It is not a cost management system. A contractor should always verify how the number has been produced rather than trusting it blindly.
Test 7: Approve a Purchase Order Through the Workflow
Ask the vendor to demonstrate the purchase order approval workflow: Use the material request that you created earlier from your own project and ask the vendor to continue with the purchase order approval process.
Observe whether the person responsible for approving the purchase order receives a notification. Can the approval be reviewed and completed from a mobile phone without logging into a desktop? Is the approval immediately visible to both the site team and the accounts team?
If the approval process requires the approving manager to log into a desktop system, it will be delayed whenever the manager is travelling, on site, or in a meeting. Every role involved in the approval process should be able to review and approve requests from a mobile phone so that site work is not delayed.
Test 8: Upload a Drawing and Revise It
Ask the vendor to demonstrate drawing revision control: Bring one of your project drawings and ask the vendor to upload it into the system during the demonstration. Then ask them to revise it by uploading a second version of the same drawing and show what happens to the previous version.
Observe whether the previous version is automatically archived when the new version is uploaded. Are all the relevant team members notified? Can the system clearly display which drawing is the current version and which one has been superseded? Are all the drawings accessible through a mobile phone?
Drawing version control is one of the most important features in construction. Even after a new drawing revision is issued, contractors and subcontractors often continue working from an outdated drawing without realizing that a newer version exists. This leads to rework, unnecessary material consumption, and delays.
A system that does not actively manage version control, notify users, mark superseded drawings, and require acknowledgment of the latest revision has not solved the problem. It is not built for construction projects.
Test 9: Generate a Report and Customise It
Ask the vendor to generate a detailed cost report: Ask the vendor to generate a detailed cost report, not just a dashboard summary. Then ask them to remove a column, add a filter, change the date range, and export the report in the format your accounts team uses, whether it is Excel, PDF, or another format.
Observe whether the report can be customized without any external assistance. Can it be exported to Excel or PDF? Does it require any manual formatting before it can be shared?
Most construction projects require reports in formats that match the requirements of clients, accountants, and internal processes. If you have to customize reports manually every time by exporting raw data and rebuilding them, it becomes time-consuming and defeats the purpose of having a construction management system.
Test 10: Use the Mobile App Without Any Guidance
Ask a site engineer to use the software: This is one of the most important steps. Log into the project on your phone and hand it over to the site engineer. Ask the site engineer to find the Daily Progress Report (DPR), fill in today’s update, attach photographs, and submit it.
Do not allow any help during the process. Observe whether the site engineer is able to complete the task independently. How long does it take? How many times does the site engineer tap the wrong option? How many screens does it take to reach the DPR?
The more the site engineer struggles during this test, the more likely your team is to avoid using the software after implementation. If it takes more than ten minutes to complete a basic DPR, the system is unlikely to be used consistently on site because it is not easy to use
Red Flags During the Demonstration: Construction Software Demo Checklist
A demo person’s behaviour and way of demonstrating the software can be warning signs that should prompt a contractor or business owner to ask tougher questions before buying the software.
The presenter never leaves the dashboard: A demonstration that depends entirely on summary views and charts without showing the underlying data entry process does not explain how the software actually works or how the reports are generated. If the presenter avoids going into the system to show how the workflows operate and only keeps showing dashboard summaries, it is a red flag.
The demo uses only screenshots instead of the live system: If the presenter relies on screenshots, videos, PDFs, or slide decks to explain how the software works, you are not seeing the actual product. You are seeing a brochure. Insist that the vendor demonstrate the live system, where real data is entered in real time and the actual workflows are performed in front of you.
The vendor declines to import your BOQ: Any reason given for rejecting your request to import your own BOQ should be treated as a warning sign. The vendor may make excuses such as, “It takes too long,” “The format needs to be prepared first,” or “We can show you the same thing using our demo data.” A system that cannot import a real Excel BOQ during the demonstration is likely to require much more manual work than a construction management software should.
Difficult questions are redirected to a follow-up: Every difficult question you ask about a specific workflow that is answered with, “I can check on that and come back to you,” may indicate a gap in the product. One or two follow-ups are normal, but if the response to most detailed workflow questions is a request to follow up later, it usually means the system does not handle those scenarios adequately.
The site engineer cannot use the mobile app without help: If the vendor allows all of the tests and the result still shows that the site engineer is not able to use the mobile app without assistance, and requires constant guidance even for basic tasks, it is a red flag.
A construction management system should be simple enough for a site engineer to use independently after basic training. If the vendor has to guide every step during the demonstration, the software is unlikely to be adopted consistently on site.
Construction Software Demo Checklist: Scorecard
Complete this scorecard during the demonstration. Use it to compare vendors after multiple demonstrations.
| Workflow to Test | Pass | Needs Clarification | Failed |
|---|---|---|---|
| Create a Daily Progress Report from a mobile device | ☐ | ☐ | ☐ |
| Import an actual BOQ | ☐ | ☐ | ☐ |
| Raise and approve a Material Request | ☐ | ☐ | ☐ |
| Record labour attendance on site | ☐ | ☐ | ☐ |
| Track Budget vs Actual for a project | ☐ | ☐ | ☐ |
| Create a Purchase Order | ☐ | ☐ | ☐ |
| Upload and manage drawing revisions | ☐ | ☐ | ☐ |
| Create a Variation Order | ☐ | ☐ | ☐ |
| Generate a project progress report | ☐ | ☐ | ☐ |
| Let a site engineer use the mobile app without assistance | ☐ | ☐ | ☐ |
Download the complete Construction Software Demo Scorecard (Excel) to compare multiple software vendors during your evaluation process.
What to Do After the Demonstration
The demonstration ends, the vendor answers your questions, and then leaves. What you do after the demonstration determines whether the software becomes a good decision or a regrettable one.
You do not need to decide immediately. The impression a demonstration leaves is often strongest right after it finishes. A purchasing decision should not be made based only on that first impression. Wait at least 24 hours before forming a conclusion.
Use the construction software demo checklist. Fill it in carefully while the details are still fresh. Review it against your checklist. Note which tests the software passed, which ones still need clarification, and which ones failed. Compare every vendor using the same scorecard. A vendor that passes more than eight of the tests is likely to be a strong choice.
Before the second demonstration, speak to a reference customer. Ask them what problems they have faced with the software. Do this before the second demo so that any gaps identified by the reference customer can be tested during the follow-up session.
Construction management platforms like Onsite encourage contractors to bring their own BOQ and project data to every demonstration and offer a trial period on a real project before asking for a purchasing decision.
If you would like to run the ten tests in this article against Onsite’s platform using your own data and your own site engineer operating the mobile app, request a demonstration.
Conclusion
You do not need to buy construction management software just because the demonstration was impressive. You should buy it because it fulfills the needs of your construction company, from handling your actual workflows and project data to being usable on a mobile app without constant guidance.
The software should prove that it works under real project conditions. Your decision should be based on how well it performs when you control the demonstration, not when the presenter controls it.
The Construction Software Demo Checklist in this article gives contractors the tools to take control of the demonstration, test the software under real construction conditions, and compare vendors objectively rather than making a decision based on a well-rehearsed presentation.
Frequently Asked Questions
What is a construction software demo checklist?
A construction software demo checklist is a structured set of tests a contractor uses during a software demonstration to verify that the platform handles real construction workflows — not just prepared demo scenarios. It differs from a feature checklist in that it asks the vendor to demonstrate specific processes — creating a daily progress report from a phone, following a material request from submission to delivery, handling a variation order — rather than confirming that a feature exists. The checklist produces a scored evaluation of each vendor that can be compared objectively after multiple demonstrations, rather than relying on the impression left by each individual demo.
What should I ask during a construction software demo?
The most revealing question during a construction software demo is not a question at all — it is a request. Ask the vendor to demonstrate specific workflows from start to finish rather than asking whether those workflows exist. Ask them to create a daily progress report on a phone, import your actual BOQ, follow a material request through to a purchase order, and show a variation order’s effect on billing. Ask to give the mobile phone to your site engineer and watch them complete the DPR without guidance. These practical tests reveal the gap between what a software vendor says the system can do and what it actually does under real conditions.
How long should a construction software demonstration last?
A construction software demonstration that covers all ten of the tests in this checklist — using the contractor’s own project data — should last between 90 minutes and two hours. A demonstration shorter than 60 minutes almost certainly has not covered the full range of workflows a construction business requires. A demonstration that runs longer than two hours without producing concrete answers to specific tests is providing information volume rather than evaluation value. The objective is not to see everything the software can do. It is to test whether the software handles the workflows your business depends on.
Should I use my own project data during the software demo?
Yes, and insisting on it is one of the most important things a contractor can do during a software evaluation. A vendor who demonstrates the software using their own pre-configured demo data is in complete control of what is shown and how it behaves. Bringing your own BOQ, your own project, and your own workflow scenarios removes that control and tests whether the software works in the conditions your business actually operates in. A vendor who declines to use your data — citing time constraints or format requirements — has revealed a limitation that should be investigated before any purchase decision is made.
What should site engineers test during a construction software demo?
Site engineers should test the mobile app specifically — without guidance from the vendor’s sales team. The most useful test is to give the site engineer the demo phone and ask them to complete a daily progress report for today, attach a photograph, and submit it — without any instruction from the salesperson. Observe how long it takes, how many incorrect taps are made, and whether the site engineer completes it independently. If the site engineer cannot complete the most basic daily task in under five minutes without help, the system will not be adopted consistently on site regardless of how capable the other features are.
Can I request a trial period before buying construction software?
Yes, and a trial period on a real active project is the most accurate evaluation available — more accurate than any demonstration, however thorough. Most construction software vendors offer a free trial ranging from 14 to 30 days. A trial puts the actual site team in contact with the software on a live project — with real data, real timelines, and real workflow requirements — and produces evidence of whether the system works in practice that no demonstration can replicate. If a vendor does not offer a trial, ask whether they have a pilot project programme, a limited-scope evaluation licence, or a money-back period after initial purchase.
