
How to Add Bank Details
How to add your company’s bank account details in Onsite, including account number, IFSC code, UPI ID, and IBAN for international payments. Bank details added here appear on Sales Invoices and financial documents so clients know where to send payment. Also covers adding multiple accounts, setting an opening balance, and editing or deleting accounts.
Before You Start
- You need Admin access
- Have your bank account number, IFSC code, and bank name ready before starting
- For international clients (Middle East, export), keep your IBAN number handy
Where Bank Details Appear
Bank details added here are available to select on Sales Invoices when creating them. The selected bank account appears in the payment details section of the invoice PDF, so the client can see where to transfer payment.
Bank details do not appear automatically on all invoices. When creating a Sales Invoice, the person raising the invoice selects the bank account from a dropdown. If no account is added here, the dropdown will be empty and no bank details will print on the invoice.
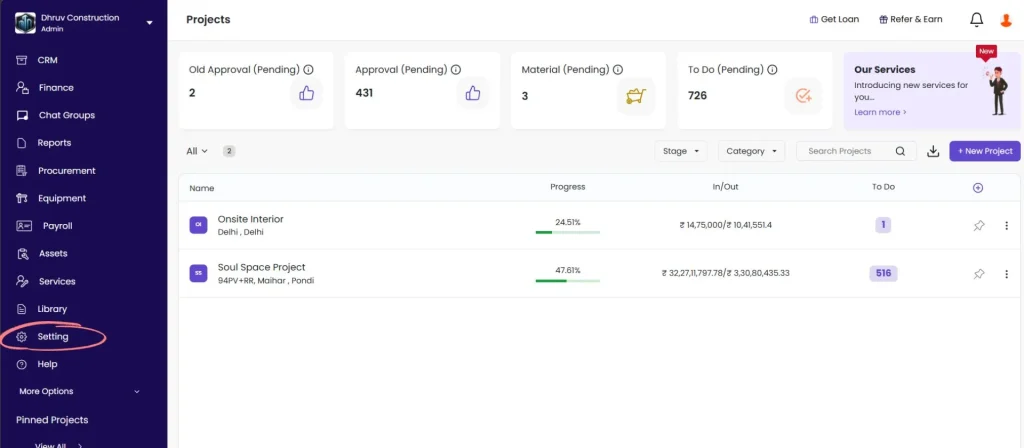
Step 1: Go to Settings
Click Setting in the left sidebar.
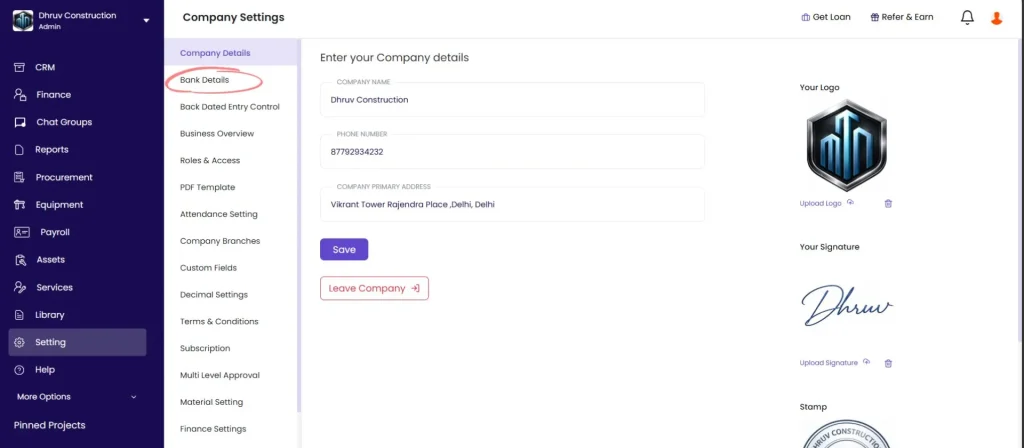
Step 2: Open Bank Details
Click Bank Details from the Settings menu.
Step 3: Add a New Bank Account
Click + New Account.
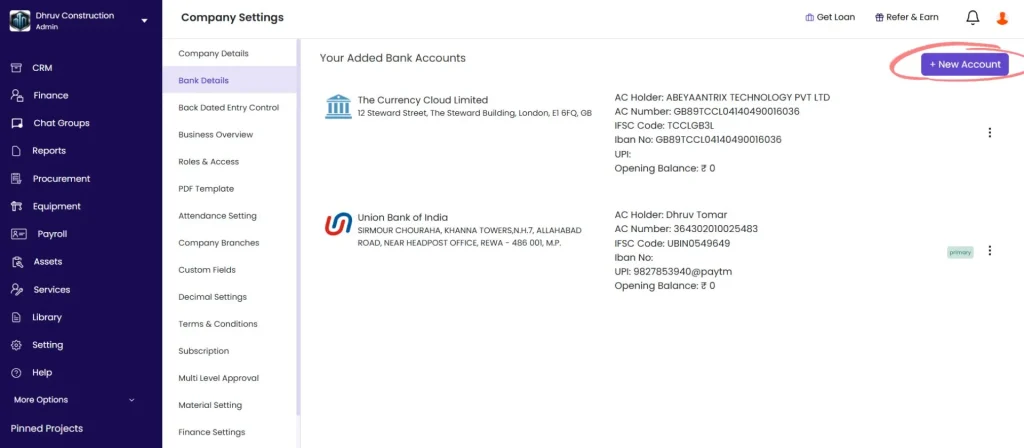
A form appears on the right side of the screen.
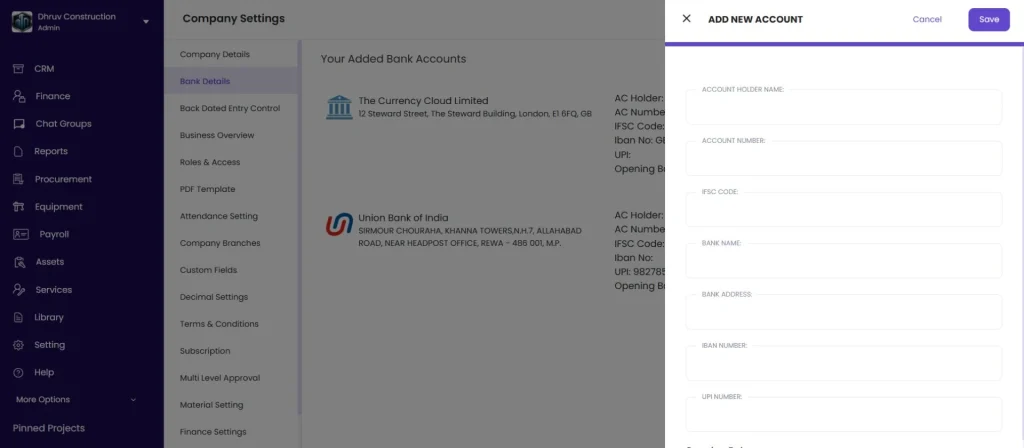
Step 4: Fill in the Bank Account Details
| Field | Required | What to Enter |
|---|---|---|
| Account Holder Name | Yes | Name exactly as it appears on the bank account (e.g. “ABC Constructions Private Limited”) |
| Account Number | Yes | Your full bank account number |
| IFSC Code | Yes (India) | 11-character IFSC code of your bank branch (e.g. HDFC0001234). Find it on your cheque book or bank passbook. |
| Bank Name | Yes | Name of the bank (e.g. “HDFC Bank”, “State Bank of India”, “Axis Bank”) |
| Bank Address | Optional | Address of your bank branch |
| IBAN Number | Optional | International Bank Account Number. Required only for international wire transfers. Relevant for companies working with clients in the UAE, Gulf, or other international markets. |
| UPI Number | Optional | Your company’s UPI ID (e.g. company@okaxis, business@hdfcbank). Fill this in if you accept UPI payments from clients. |
| Opening Balance | Optional | The opening balance of this account at the time of adding it to Onsite. Used for bank-level financial tracking within the app. |
Step 5: Save
Click Save to add the bank account.
The account is now available for selection when creating Sales Invoices.
About Opening Balance
The Opening Balance field sets the starting balance of the bank account in Onsite at the time you add it.
When to use it:
- If you are starting to use Onsite mid-way through the financial year and want your bank balance in the app to reflect the actual current balance, enter the balance as of the date you are setting up Onsite.
- If you are starting fresh with no prior transactions in Onsite, enter 0 or leave it blank.
The opening balance is used for internal tracking. It does not affect your accounting software or actual bank records.
Adding Multiple Bank Accounts
You can add as many bank accounts as needed. This is useful when:
- Your company has accounts with different banks and uses different accounts for different types of payments
- You have separate accounts for project-related payments and overhead expenses
- You have accounts in different currencies for international clients
To add another account, click + New Account again and repeat Steps 4 and 5.
When creating a Sales Invoice, the person raising the invoice selects which account to display for that client from the dropdown.
Editing a Bank Account
- Go to Setting, then click Bank Details
- Find the account in the list
- Click the edit (pencil) icon next to the account
- Update the fields you need to change
- Click Save
Changes apply to new documents going forward. Existing invoices that already have this bank account selected will not be updated automatically.
Deleting a Bank Account
- Go to Setting, then click Bank Details
- Find the account in the list
- Click the delete (trash) icon next to the account
- Confirm the deletion
Once deleted, the account will no longer appear in the bank account dropdown on new invoices. Existing documents that referenced this account are not affected.
Tips
- IFSC codes are always 11 characters. The first 4 characters are the bank code, the 5th is always 0, and the last 6 are the branch code. If a code shorter than 11 characters is entered, it will not be accepted.
- IBAN is not used for domestic Indian transactions. Only add it if your company sends or receives international wire transfers, particularly from clients in the UAE or other GCC countries.
- UPI ID is optional but recommended if clients pay digitally. The UPI ID appears on the invoice so clients can scan or type it directly.
- Always select a bank account when creating a Sales Invoice so the client knows where to transfer payment. If no account is selected on the invoice, the payment details section of the PDF will be blank.
- If a team member reports that no bank account is available in the invoice dropdown, it means no bank account has been added in Settings yet. Add at least one account here first.
If Something Goes Wrong
| Problem | Likely Cause | What to Do |
|---|---|---|
| Cannot see Bank Details option | Not an Admin | Ask your Admin to add the bank details or grant Admin access |
| Save button not working | Required field is empty | Make sure Account Holder Name, Account Number, Bank Name, and IFSC Code are all filled in |
| IFSC code not accepted | Incorrect format or length | IFSC codes are exactly 11 characters. Verify the code on your cheque book or at the RBI IFSC lookup tool and re-enter |
| Bank account not appearing in the invoice dropdown | Account not yet added in Settings | Add the account in Settings and then reopen the invoice form |
| Bank details not printing on the invoice PDF | Bank account not selected on the invoice | Open the invoice, edit it, select the bank account from the dropdown, and save |
| Need to update account number or IFSC | Account details changed | Edit the account via the pencil icon, update the fields, and save |
| Account was deleted by mistake | Cannot recover a deleted account | Add it again as a new account with the correct details |