
How to Manage Tasks and Track Project Progress in Detail
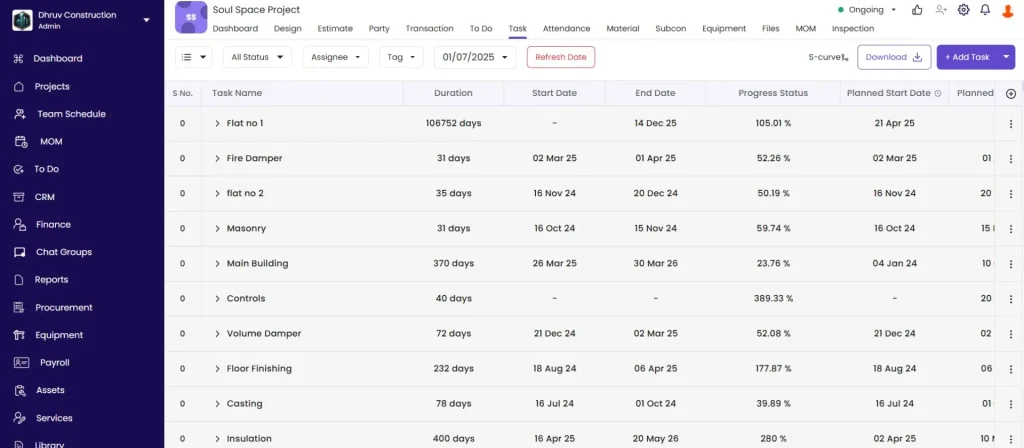
Detailed task management — creating tasks and importing from BOQ, updating progress with measurements, managing material, labour, and equipment resources per task, attaching inspection forms, using the S-curve and Month-on-Month charts, setting Refresh Dates for planned progress tracking, and switching between Gantt, Resources, and List views.
For a full guide to the Task tab covering hierarchy, dependencies, filters, DPR, and all views, see How to Manage Tasks and Project Schedule in Onsite. This article focuses on the resource management, progress tracking, and planning tools.
Before You Start
- You must be inside a project
- Tasks must be created before resources can be added or progress can be updated
- Inspection forms must be created in Settings before they can be attached to tasks
- Materials must be in the project’s Material tab before they can be added as task resources
Part 1 — Adding a Task
Click + Add Task in the task list.
| Field | Required | What to Enter |
|---|---|---|
| Task Name | Yes | Description of the work item |
| Duration (days) | Yes | Number of days planned |
| Start Date / End Date | No | Select from the calendar |
| Unit | No | Unit for progress tracking (sqft, cft, nos, RMT, MT, etc.) |
| Est Quantity | No | Total planned quantity for this task |
| Tags | No | e.g. Civil, Electrical, MEP — for filtering |
| Assign To | No | Select a team member from the dropdown |
Task auto-saves as you work. Look for the Saving… indicator in the top bar.
Part 2 — Importing Tasks from BOQ or Other Projects
Click the dropdown arrow next to + Add Task to see import options.
From BOQ
- Click From BOQ
- A panel shows all BOQs for this project
- Click the BOQ to pull from
- Tick the checkboxes next to each item you want to add as a task
- Click Save
Each selected item is added as a task with its name and estimated quantity pre-filled from the BOQ.
From Other Projects
- Click From Other Projects
- Search and select the project to copy from
- Click Next
- Tick the tasks you want to copy
- Click Save
Import CSV
- Click Import CSV
- Download the template
- Populate the template with task names, durations, and dates
- Upload the completed file
Part 3 — Updating Task Progress
Click on any task to open its detail panel, then click + Progress.
| Field | What to Enter |
|---|---|
| Date | Defaults to today — change if entering for a past date |
| Number | Count dimension (e.g. 10 for 10 items, or 10 for 10 metres of length) |
| Length | Length dimension if applicable |
| Width | Width dimension if applicable |
| Progress Quantity | Auto-calculated as Number x Length x Width in the task’s unit |
| Location | Select from the project’s Location Structure (e.g. Floor 2, Zone A) |
| Notes | Optional remarks about this entry |
Click Save Progress.
Progress is cumulative — each entry adds to the previous total. The task completion percentage updates automatically.
💡 For area-based tasks (flooring, plastering, painting in sqft), fill Number, Length, and Width. For count-based tasks (doors, windows, light points in nos), enter the quantity in Number and leave Length and Width blank.
Part 4 — Managing Task Resources
Click on a task to open its detail panel, then click the Resources tab.
Three sub-tabs appear:
| Sub-tab | What It Tracks |
|---|---|
| Material | Materials allocated to this task with budget, planned, actual, and exceeded quantities |
| Labour | Workforce assigned with budget and actual hours |
| Equipment | Equipment linked to this task |
Resource Quantity Columns
| Column | What It Shows |
|---|---|
| Budget Qty | Planned quantity manually set for this task |
| Planned Qty | Expected consumption scaled to current task progress percentage |
| Actual Qty | Real consumption auto-pulled from Material Used, Attendance, and Equipment entries tagged to this task |
| Exceeded Qty | Actual Qty minus Planned Qty — shown in red when positive |
Adding Material Resources
Click + Add in the Material sub-tab.
Select the material from the project inventory and enter the Budget Qty (planned total for the full task).
Click Edit next to any existing material resource to update the Budget Qty.
Adding Labour Resources
Click + Add New Workforce in the Labour sub-tab.
Select the workforce type (e.g. Mason, Carpenter) and enter the Budget Qty in workforce-hours.
Adding Equipment Resources
Click + Add in the Equipment sub-tab.
Select the equipment from the project equipment list and enter the Budget Qty.
⚠️ Check Exceeded Qty regularly across all resource types. When actual consumption exceeds the planned budget on a task, it signals a cost overrun on that item that needs investigation before it compounds further.
Part 5 — Attaching and Running Inspection Forms
Attaching a Form
- In the task detail panel, click + Attach Inspection Form
- Select the form from the list (forms are created in Settings, Inspection Forms)
- Note the Trigger — Before Completion means the form must be filled before the task can be marked done
- Click Save
Running an Inspection
- Click Start on the attached inspection
- Fill in each checklist field (number, text, Yes/No, or Pass/Fail depending on form design)
- Click Mark Passed or Mark Failed
The result appears in the task detail with the inspector’s name, date, and Pass or Fail outcome.
Part 6 — S-Curve and Month-on-Month Progress
S-Curve
Click S-curve from the task toolbar to open the cumulative planned vs actual progress chart.
Use the S-curve to spot delays early. If the actual line falls below the planned line, the project is running behind schedule.
Month-on-Month Progress
Click Month on Month Progress to switch to a bar chart showing progress increments by month.
Both charts can be downloaded as SVG, PNG, or CSV from the Project Dashboard, Operational tab.
Part 7 — Refresh Date (Planned Progress Snapshots)
The Refresh Date captures a planned progress snapshot at a specific point in time. Use it to record what the team planned to achieve by a certain date, then compare against what was actually done.
Adding a Refresh Date
- Click the current date shown in the task toolbar
- Click + Add New
- Select the snapshot date
- Click Save
Recording Planned Progress for a Date
- Click the new date to make it the active Refresh Date
- Click Select Task and choose a task
- Enter the planned progress value for that task as of this date
- Click Save
Repeat for each task you want to track against this snapshot.
💡 Set Refresh Dates at regular intervals (weekly or fortnightly) to build a timeline of planned vs actual progress for management reporting or client presentations.
Part 8 — Gantt View
Click Gantt View from the task toolbar.
Set the time scale: Day, Week, or Month.
Set the date range using the From field to focus on a specific period.
Dependency lines appear as connecting arrows between tasks. Tasks where the actual bar extends beyond the planned bar are running behind schedule.
Part 9 — Resources View
Click Resources View from the toolbar.
This view shows all team members and their task allocations across the project timeline. Use the arrow buttons to scroll through time periods.
Use Resources View to identify which team members are overallocated and which have capacity for additional tasks.
Tips
- Use the Exceeded Qty column in the Resources tab as a weekly cost overrun alert. Red rows need investigation before the variance grows.
- The S-curve in Month mode gives a high-level overview. Use Week mode for near-term planning and spotting short-term delays.
- Attach inspection forms with the Before Completion trigger to enforce quality checks before a task is closed out.
- Set Refresh Dates at the start of each week or fortnight to build a planned progress log. This is the data source for variance analysis in stakeholder reports.
- Tasks pulled from the BOQ via From BOQ carry pre-filled names and quantities. This ensures the task list and financial estimate stay aligned from the start.
- Assign all tasks to specific team members. Unassigned tasks have no accountability and are harder to track in the Resources view.
If Something Goes Wrong
| Problem | Likely Cause | What to Do |
|---|---|---|
| Task not saving | Task Name or Duration is blank | Fill both required fields and try again |
| Cannot assign a team member | Person not added to the project | Add them via the project Party tab first |
| Gantt View appears empty | Date range does not cover any task dates | Adjust the From date to include your task start dates |
| S-curve shows no data | No progress entries recorded | Update task progress before checking the S-curve |
| Inspection form not appearing | Form not attached to this task | Click + Attach Inspection Form in the task detail and select a form |
| Exceeded Qty showing for all resources | No Budget Qty set on resources | Click Edit on each resource and enter the Budget Qty |
| From BOQ list is empty | No BOQs created in the Estimate tab | Create a BOQ in the Estimate tab first |