
How to Create a New Project in Onsite
How to create a new project in Onsite from start to finish — entering project details, adding team members, and setting up the location structure.
Before You Start
- Only Admin and Super Admin roles can create projects by default
- To allow another role to create projects, go to Settings, then Roles and Access, and enable the Create Project permission for that role
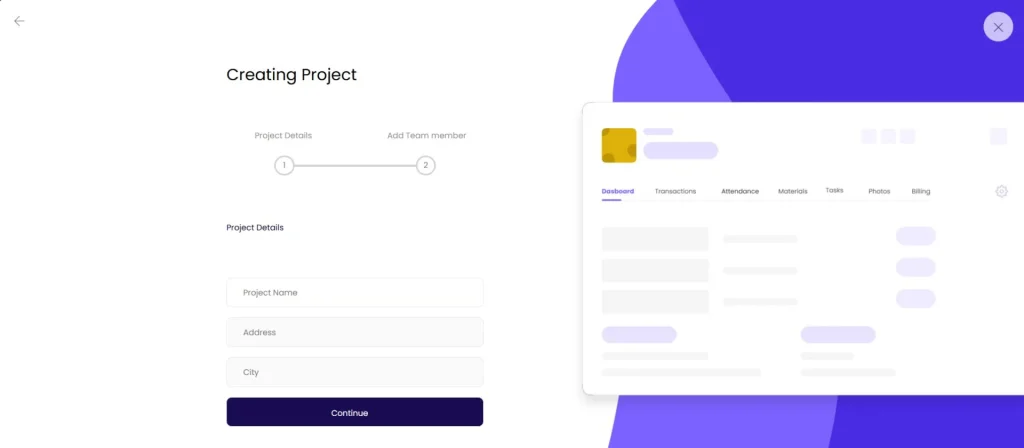
Step 1: Open the Create Project Form
- Click Projects in the left sidebar
- Click + New Project in the top right corner
A Creating Project dialog opens with two steps: Project Details and Add Team Member.
Step 2: Enter Basic Details
| Field | Required | What to Enter |
|---|---|---|
| Project Name | Yes | Full name of the project (e.g. “Residency Block A — Sector 22”) |
| Address | No | Site address |
| City | No | City where the project is located |
Click Continue.
Step 3: Complete Project Settings
After clicking Continue, a Project Setting panel opens with three tabs: Project Details, Members, and Location Structure.
Project Details Tab
| Field | Required | What to Enter |
|---|---|---|
| Project Code | No | Auto-generated short code (e.g. “NR”). Editable to match your internal coding. |
| Project Name | Yes | Carried over from Step 2 |
| Project Stage | No | Current phase of execution (e.g. Civil, Structural, Finishing, Handover). Select from dropdown. |
| Project Category | No | Type of project (e.g. Residential, Commercial, Interior, Infrastructure). Select from dropdown. |
| Start Date | No | Planned project start date |
| End Date | No | Planned project end date |
| Project Address | No | Carried over from Step 2. Click to expand and enter full address and pin the location on Google Maps. |
| Attendance Radius | No | Geofence radius in metres for mobile punch-in (default: 500 metres). Staff must be within this distance of the project location to mark attendance. |
| Project Value | No | Total contract value in Rs (default: 0 — can be updated anytime from Project Settings) |
| Project Orientation | No | e.g. North-facing, East-facing |
| Project Dimension | No | Overall site dimensions |
| Scope of Work | No | Free text describing what is in scope for this project |
💡 Project Stage and Category options are configured by your Admin. If the stage or category you need is not in the dropdown, ask your Admin to add it via Project Settings. See How to Manage Project Stages and Categories.
Members Tab (Optional)
Shows members already on the project. The Super Admin who creates the project is added automatically.
- Click Search and Add Person to add team members during setup
- You can skip this and add members later from the project’s Party tab
Location Structure Tab (Optional)
Define location zones within the project — floors, blocks, wings, rooms.
- Click + Location to add a top-level location (e.g. “Floor 1”, “Block A”)
- Click the three-dot icon on any location to add sub-locations beneath it (e.g. Floor 1 with Bedroom 1, Bedroom 2 underneath)
You can skip this step and set up the Location Structure later from Project Settings. The Location Structure is used by the Inspection module when running inspections — inspectors select a location from this list for each inspection entry.
Step 4: Finish
Click Finish.
The project is created and you land on the Project Dashboard. The new project appears in your Projects list immediately.
What You Can Update Later
All project settings can be changed after creation — nothing is locked at this stage.
| What to Update | Where to Go |
|---|---|
| Project Name, Stage, Category, Value | Project Settings icon, then Project Details |
| Team members | Project Party tab |
| Location Structure | Project Settings icon, then Location Structure |
| Attendance Radius | Project Settings icon, then Project Details |
| Project Address and Geo Location | Project Settings icon, then Project Details |
Tips
- Set the Attendance Radius to match your actual site footprint. The default 500 metres is generous. For enclosed sites (apartment buildings, indoor projects), 50 to 100 metres gives better location enforcement.
- The Project Value is used on the Project Dashboard to show budget vs actual. Enter the contract value at the start and update it whenever the contract is revised.
- Location Structure is required before running inspections. If your project has inspections from day one, set up the floor and room structure immediately after creating the project.
- Members can be added at any time from the Party tab. You do not have to add all team members during project creation.
If Something Goes Wrong
| Problem | Likely Cause | What to Do |
|---|---|---|
| + New Project button not visible | Role does not have Create Project permission | Ask Admin to enable Create Project on your role in Settings, then Roles and Access |
| Project Stage or Category not in dropdown | Not created by Admin | Ask Admin to add the stage or category via Project Settings |
| Project not appearing in the Projects list after creation | App not refreshed | Pull down to refresh on mobile, or reload on web |
| Attendance not registering for staff after project creation | Attendance Radius not set or set too small | Go to Project Settings, open Project Details, and adjust the Attendance Radius |