
How to Manage the Complete Material Flow in Onsite
The complete material lifecycle in Onsite — from adding materials to a project, raising a Material Request on site, through procurement (RFQ and PO), receiving goods (GRN), recording usage, issuing to subcontractors, and booking the financial purchase transaction.
Before You Start
- Materials must exist in the Material Library before they can be requested, received, or issued
- Suppliers must be added as parties before they can be linked to RFQs or POs
- Subcontractor Work Orders must be created before issuing materials to subcontractors
How the Material Flow Works
| Step | What Happens | Where |
|---|---|---|
| 0 | Add materials to the project | Project, Material tab |
| 1 | Site team raises a Material Request | Project, Material tab |
| 2 | Procurement raises an RFQ for supplier quotes | Procurement, left sidebar |
| 3 | Purchase Order raised for selected supplier | Procurement, left sidebar |
| 4 | Materials arrive on site — GRN created | Project, Material tab |
| 5 | Materials consumed from stock | Project, Material tab |
| 6 | Materials handed to subcontractor | Project, Material tab |
| 7 | Financial expense transaction created | Project, Transaction tab |
Not every project uses all steps. Small purchases can skip the RFQ. Some projects go directly from GRN to Purchase Booking. Follow the steps relevant to your company’s workflow.
Step 0 — Add Materials to the Project
Before raising requests or tracking stock, add the materials you want to track to the project’s material list.
Option A: Add from Library
- Open the project and click the Material tab
- Click + Add Material
- Search and select materials from the Material Library
- Enter the Opening Stock — the quantity already physically on site when you start tracking
- Enter the Estimated Quantity — the total quantity expected to be used for this project
- Enter the Budgeted Unit Rate — cost per unit in Rs
- Click Save
Option B: Import via CSV
Use this to add multiple materials to the project at once.
- Open the project and click the Material tab
- Click the Import icon
- Upload your CSV file
The CSV must use this format:
| Column | What to Enter |
|---|---|
| Material Name | Must match the name exactly as it appears in the Material Library |
| Opening Stock | Quantity currently on site at the time of setup |
| Estimated Quantity | Total expected consumption for this project |
| Budgeted Unit Rate | Cost per unit in Rs |
💡 Material names in the CSV must match the Material Library exactly. If a name does not match, that row will not import. Add new materials to the Library first, then import.
Step 1 — Material Request
A Material Request (MR) is raised by the site team when materials are needed for the project.
How to Create a Material Request
Open the project, click the Material tab, click + Create, and select + Request.
Fill in the Request
- The system auto-generates an MR number (e.g. MR-72)
- Select materials from the Material Library — search by name or filter by category, then tick the checkboxes
- Enter the Quantity for each material
- Optional: add Specifications, upload a photo, or add a Note
- Click Save
What Happens After Saving
- The MR appears in the material list with status Pending
- Relevant team members are notified based on Alert Settings
- The MR flows into procurement for RFQ or direct PO creation
MR Status Flow
| Status | Meaning |
|---|---|
| Pending | Request raised, awaiting action |
| Approved | Approved by a manager |
| Rejected | Not approved |
| Ordered | A Purchase Order has been raised against this MR |
Step 2 — Material RFQ (Request for Quotation)
An RFQ collects quotes from multiple suppliers before placing an order. This step is optional for small or routine purchases.
How to Create an RFQ
Click Procurement in the left sidebar, click RFQ, then click + New RFQ.
Fill in RFQ Details
| Field | What to Enter |
|---|---|
| Project | Select the project this RFQ is for |
| Bidding Start Date | When suppliers can start submitting quotes |
| Bidding End Date | Deadline for quote submission |
| Bill To / Ship To | Billing and delivery addresses |
| Tax Type | Item Level Tax or Bill Level Tax |
Add materials: Click Import from Material Request to pull in items from an approved MR — this links the RFQ to the original request. Alternatively, add materials manually from the library.
Add suppliers: Add one or more supplier parties. Each supplier gets their own column in the Supplier Entries tab for quote comparison.
Save and Publish
| Option | What It Does |
|---|---|
| Save Draft | Saves without notifying suppliers |
| Save and Publish | Sends the RFQ to suppliers via email or WhatsApp |
Collecting Quotes — Supplier Entries Tab
| Column | What It Shows |
|---|---|
| Quantity | Quantity quoted by the supplier |
| Quoted Price | Price per unit |
| Tax | Tax on the quote |
| Total | Total quote amount |
Punch Quotation: If a supplier sends their quote via phone or email, use Punch Quotation to manually enter their rates.
Send Reminder: Use Send Email or Send WhatsApp to follow up with suppliers directly from the RFQ screen.
Convert to PO
Once quotes are compared, click Convert to PO on the selected supplier’s quote. This creates a Purchase Order pre-filled with the supplier’s items and rates.
Step 3 — Material PO (Purchase Order)
A Purchase Order is the formal order sent to a supplier.
How to Create a PO
Click Procurement in the left sidebar, click Purchase Order, then click + Create PO.
You can also create a PO directly from an RFQ by clicking Convert to PO (see Step 2 above).
Fill in PO Details
| Field | What to Enter |
|---|---|
| Vendor | Select the supplier party |
| Project | Select the project |
| Bill To | Billing address |
| Ship To | Delivery address |
Add materials: Link to a Material Request to import items, or add materials manually. For each item enter: Unit Rate, Tax %, and Discount.
Save the PO
| Option | What It Does |
|---|---|
| Save as Draft | PO created but not sent to vendor |
| Save and Publish | PO finalised and shared with vendor |
The system auto-generates a PO number (e.g. PO-86).
PO Status
| Status | Meaning |
|---|---|
| Draft | PO saved but not published |
| Approved | PO published and confirmed |
| Ordered | Materials ordered and pending delivery |
| Rejected | PO cancelled or declined |
Pending to Receive
Once a PO is published, its items appear in the project’s Pending to Receive panel (badge on the Material tab header). This shows all outstanding PO items not yet received on site.
Step 4 — Material Received (GRN)
A GRN (Goods Received Note) records materials that have physically arrived on site.
How to Create a GRN
Open the project, click the Material tab, click + Create, and select + Received.
Fill in the GRN
- The system auto-generates a GRN number (e.g. GRN-26)
- Select the Party (supplier who delivered the materials)
- Add materials received — either from the Material Library directly, or from Purchase Order Items to link this GRN to a specific PO for full traceability
- Enter the Quantity for each material
- Optional: Delivery Challan number, Vehicle Number, Note, Upload Media (delivery photo or challan scan)
- Click Save
What Happens After Saving
- The Received count updates on the Material List
- Current Stock increases accordingly
- The GRN is available for linking in the Material Purchase Booking (Step 7)
- A WhatsApp alert is sent to relevant roles if enabled in Alert Settings
💡 Always use Purchase Order Items when receiving against a PO. This links the GRN to the original order and maintains the audit trail from request through to receipt and invoice.
Step 5 — Material Used
Recording material usage deducts quantities from the current project stock.
How to Record Material Used
Open the project, click the Material tab, click + Create, and select + Used.
Select the material and enter the quantity consumed.
| Usage Type | When to Use |
|---|---|
| Used in Production | Material consumed in on-site construction or production work |
| Used in Equipment | Material used for equipment (e.g. diesel, lubricant, oil) |
Checking Stock After Usage
The Material tab shows live stock for all materials:
| Column | What It Shows |
|---|---|
| Estimated | Total quantity budgeted for the project |
| Received | Total quantity received via GRNs |
| Current Stock | Received minus Used minus Issued |
Click the Received count on any material row to see a detailed stock breakdown including: Remaining on Site, Estimated Quantity, Stock In and Stock Out summary, and all movement entries with dates and sources.
Step 6 — Material Issued to Subcontractor
When materials are handed to a subcontractor for their work, record it as a Subcon Issue. This deducts from your stock and tracks what was given.
How to Issue Materials to a Subcontractor
Open the project, click the Material tab, click + Create, and select + Subcon Issue.
- Select the Work Order for the subcontractor
- Add materials from your inventory — select items and enter the quantity to issue
- Click Save
What Happens After Saving
- Stock is deducted from the project’s current inventory
- The Subcon Work Order’s Materials tab reflects what was issued
- The subcontractor can see what materials were allocated to their work order
Step 7 — Material Purchase Booking
The Material Purchase Booking creates the financial expense transaction for materials received. This links the GRN (physical receipt) to the project accounts.
⚠️ Receiving materials via a GRN only updates stock counts. The financial expense is only recorded when you create a Material Purchase transaction. Always complete this step after receiving materials.
How to Book a Material Purchase
Open the project, click the Transaction tab, click + Transaction, and select Material Purchase.
Fill in the Purchase Booking
- Select the Vendor (supplier party)
- Click Select Received Items — shows all GRNs from that vendor not yet financially booked
- Select the GRN or GRNs to book
- Review and adjust per-item details if needed: Quantity, Unit Rate, Tax, Discount
- Enter Paid Amount if a payment was made at the same time
- Assign a Cost Code if applicable
- Click Save
What Happens After Saving
- A Material Purchase expense entry is created in the project’s Transaction list
- The transaction appears in the vendor’s party ledger (To Pay balance)
- The GRN is now financially accounted for and disappears from the Unbilled Materials panel
Unbilled Materials: The Transaction tab toolbar shows an Unbilled Materials badge listing all GRNs received but not yet booked. Review this regularly to ensure nothing is missed before month-end.
Viewing All Material Activity
Material List
The main Material tab shows all materials for the project with live stock levels. Use the + and − buttons on any row to make quick manual stock adjustments when needed.
Recent Entries
The Recent Entries tab shows every material movement in chronological order.
| Column | What It Shows |
|---|---|
| Date | When the entry was made |
| Material | Which material |
| Description | Entry details |
| Vendor | Supplier (for received items) |
| Status | Type of movement |
| Quantity / Amount | Quantity moved and financial value |
Status types in Recent Entries:
| Status | Meaning |
|---|---|
| Received | Material received via GRN |
| Purchased | Material Purchase Booking created |
| Used in Production | Consumed in construction work |
| Used in Equipment | Consumed by equipment |
| Issued | Issued to subcontractor |
| Production | Created via on-site production (e.g. RCC batching) |
| Material Sale | Sold to another party |
Use the status filter dropdown to view only specific types of movements.
Pending to Receive
The Pending to Receive badge on the Material tab header shows the count of outstanding items from Purchase Orders.
| Tab | What It Shows |
|---|---|
| PO Items | Materials ordered but not yet received (from published POs) |
| Transferred Items | Materials transferred in from other projects that are in transit |
Tips
- Add all materials to the project’s Material tab before the team starts recording entries. Materials not added to the project cannot be requested, received, or tracked.
- Link GRNs to PO Items when receiving against a Purchase Order. This maintains the full audit trail from request through to receipt and invoice.
- RFQ is optional. For small or routine purchases, go directly from Material Request to Purchase Order.
- Do not skip the Purchase Booking step. Receiving via a GRN only updates stock. The financial liability to the vendor is only recorded when the Material Purchase transaction is created.
- Use Issued to Subcon for materials handed to a subcontractor. Use Used for materials consumed by your own team. Both deduct from stock but are tracked separately in reports.
- Check Unbilled Materials in the Transaction tab weekly before month-end. Every item there is a GRN without a corresponding bill — an unrecorded vendor liability.
- Current Stock is live and updates immediately after every GRN, Used, or Issued entry.
If Something Goes Wrong
| Problem | Likely Cause | What to Do |
|---|---|---|
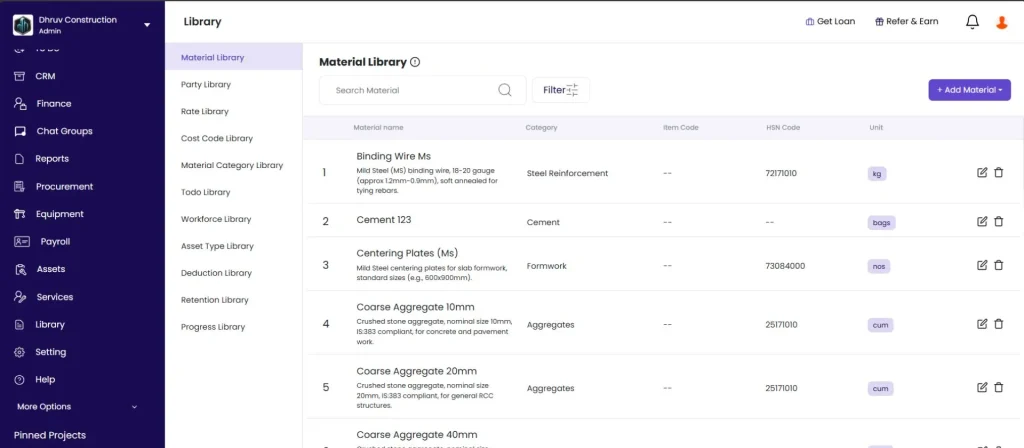
| Material not appearing in MR or GRN | Not in the Material Library | Go to Library in the left sidebar, open Material Library, and add the material |
| Material not available in the project | Not added to the project’s Material tab | Go to the Material tab, click + Add Material, and add it from the Library |
| RFQ not sent to supplier | Saved as Draft instead of Published | Open the RFQ and click Save and Publish |
| PO items not showing in Pending to Receive | PO not linked to this project or not published | Check the PO and verify the correct project is selected and the PO is published |
| GRN not updating stock | GRN not saved | Reopen the GRN entry and confirm it has a GRN number (confirms it was saved) |
| Material Purchase not in Transaction tab | Not yet created | Go to Transaction tab, click + Transaction, select Material Purchase, and book the GRN |
| Subcon Issue failing | Work Order not created | Create the Subcontractor Work Order first before issuing materials |
| Stock shows incorrect quantity | Manual entry error or wrong GRN quantity | Check Recent Entries to find the discrepancy and make a stock adjustment |
| Unbilled Materials showing old GRNs | Material Purchase not created for those GRNs | Create a Material Purchase transaction and link those GRNs |