
How to Use the Party Tab on the Onsite Mobile App
How to use the Party tab in a project on the Onsite mobile app — viewing all party balances at a glance, checking individual party transaction ledgers, and managing project team access by adding members and changing roles.
Before You Start
- You must be inside a project
What the Party Tab Shows
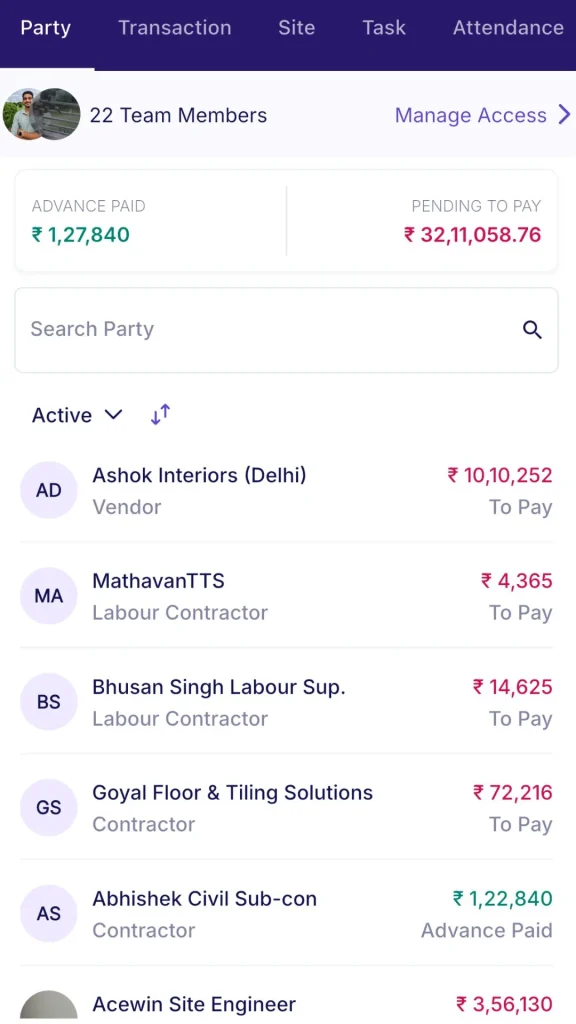
Open a project and tap the Party tab.
Header bar:
| Element | What It Shows |
|---|---|
| Team Members | Number of people with access to this project. Tap Manage Access to view and manage the team. |
| Advance Paid | Total advance paid across all parties in this project |
| Pending to Pay | Total outstanding balance owed by this project across all parties |
Party list:
Each row shows the party’s initials, name, party type (Worker, Material Supplier, Labour Contractor, Staff, Contractor, etc.), and balance with status (To Pay or Advance Paid).
List controls:
| Control | What It Does |
|---|---|
| Search Party | Search for a party by name |
| Active dropdown | Switch between Active and Inactive parties |
| Sort icon | Reorder the list (e.g. by balance amount to surface largest outstanding dues first) |
Viewing a Party Ledger
Tap any party in the list to open their Party Project Balance screen.
Header:
Party name, project name, and total balance with status (e.g. “To Pay — Rs 45,000”).
Summary tabs:
| Tab | What It Shows |
|---|---|
| Party Received | Total payments received from or paid to this party |
| Material Purchase | Total material purchase bills raised against this party |
| Debit Note | Total debit notes issued against this party |
Tap any summary tab to see the subtotal for that category. These tabs let you understand what makes up the party’s balance without scrolling through the full ledger.
Transaction history:
Below the summary tabs is a full chronological list of all transactions for this party in this project. Each entry shows: date, description, and amount.
Tap Filter to narrow the ledger by date range or transaction type.
Managing Project Access
Tap Manage Access from the Party tab header to see who has access to this project and manage their roles.
Viewing the Team
The Manage Project Access screen lists all team members with their name, phone number, and current role (e.g. Admin, Manager, Site Engineer, Accountant, Sub Contractor).
Tap any team member’s name to see a tooltip showing their role and the full list of module-level permissions.
Role Permissions
| Module | What the Permission Controls |
|---|---|
| Task Management | View and update project tasks |
| Transactions | Create and view financial transactions |
| BOQ | Access project estimates |
| Files and Photos | Upload and view project files and design documents |
| Manage Material | Record material receipts and usage |
| Attendance Management | Mark and view attendance |
| Subcon Management | Manage subcontractor work orders |
| Asset Management | Manage project assets |
| MOM | Create and view Minutes of Meeting |
| Design | Access the design and drawing tab |
| Timesheet | Log and view timesheets |
| Chat Group | Access project chat groups |
| Inspection | Fill and manage inspection forms |
💡 Admin roles have full access to all modules. Other roles (Manager, Site Engineer, Accountant, etc.) have access only to the modules enabled for their role. Role permissions are configured in Company Settings under Roles and Access.
Changing a Team Member’s Role
Tap the role label next to the team member’s name and select the new role from the dropdown.
⚠️ Role changes made here apply immediately. If the wrong role is assigned, the member may lose or gain access to modules unexpectedly. Confirm the correct role before saving.
Adding a Team Member to the Project
- Tap + Add Team Member
- The Select Party screen opens — search for the person by name or phone number
- If the person is not yet in the system, tap + New Party to create them
- Tap the person’s name to add them to the project
- Assign a role using the role dropdown next to their name
The team member now has access to this project based on their assigned role.
💡 Adding a member here gives them access to this project only. To manage access across multiple projects at once, use the web portal at web.onsiteteams.com via Settings, then Roles and Access.
Tips
- The Pending to Pay figure at the top of the Party tab is the fastest way to see the total outstanding liability for the project across all vendors and subcontractors.
- Use the Sort icon to reorder the party list by balance amount. This surfaces the parties with the largest outstanding dues at the top, making payment prioritisation faster.
- Tap the summary tabs (Party Received, Material Purchase, Debit Note) in a party ledger to understand what makes up the balance without reading every transaction entry.
- Use Manage Access from the Party tab when a new team member joins a project mid-way. It is faster than navigating to Company Settings on mobile.
- Switch the Active dropdown to Inactive to see parties that have been removed from the active list. Their ledger history remains available even when inactive.
If Something Goes Wrong
| Problem | Likely Cause | What to Do |
|---|---|---|
| Party not appearing in the list | Party not linked to this project | Go to the Party tab options and add the party to the project first |
| Balance amount looks incorrect | Recent transaction not yet synced | Pull down to refresh the screen |
| Team member not found in Add Team Member search | Person not added as a party yet | Tap + New Party to create them, then add them to the project |
| Cannot change role | Insufficient access — not an Admin | Ask the project Admin to make the role change |
| Party ledger showing incomplete history | Date or type filter is active | Tap Filter and clear all active filters to see the full history |