
How to Use Payment Requests in Onsite
How to create Payment Requests for advances and outgoing payments, select the correct request type, enter amounts as a fixed value or percentage, record the actual payment once approved, and track request status. Also covers creating Payment Requests directly from a Subcontractor Work Order.
Before You Start
- The party (supplier, subcontractor, labour contractor) must be added to the project’s Party tab before you can raise a request against them
- For requests linked to a Purchase Order or Subcontractor Work Order, those documents must be created first
What Is a Payment Request?
A Payment Request (PR) is a formal request for funds to be paid out from the project. It sits in a pending state until an authorised person reviews and approves it, after which the actual payment is recorded.
When to use a Payment Request instead of a direct Payment Out:
| Use Payment Request | Use Direct Payment Out |
|---|---|
| Advance to a supplier before a bill arrives | Paying an existing bill that is already recorded |
| Petty cash request from a site team member | Settling an invoice immediately after approval |
| Any outgoing payment that requires approval before being released | Same-day cash payment where no prior approval is needed |
| Subcontractor mobilisation advance | Routine vendor payment against a received GRN |
⚠️ Payment Requests do not create a financial transaction by themselves. The transaction is only created when you click Record Payment against an approved request. Raising a PR does not move money.
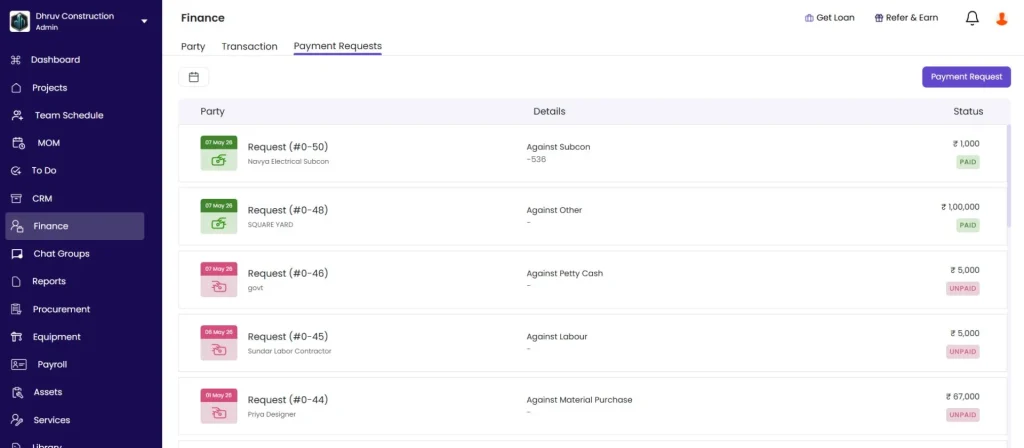
Where to Find Payment Requests
Go to the project, click the Transaction tab, then click the Payment Requests sub-tab.
| Column | What It Shows |
|---|---|
| Date badge | Date the request was created |
| Request No. | Auto-generated reference (e.g. PR-1, PR-2) |
| Party | Party the payment is for |
| Details | Request type and linked reference (e.g. “Against PO / PO-58”) |
| Amount | Requested amount |
| Status | UNPAID or PAID |
Step 1: Create a Payment Request
Click + Payment Request in the top right of the Payment Requests sub-tab.
Fill in the following fields:
| Field | Required | What to Enter |
|---|---|---|
| Request No. | Read only | Auto-generated (e.g. PR-3) |
| Date | Yes | Auto-filled with today’s date. Edit if needed. |
| Party Name | Yes | Search and select the party this payment is for |
| Type | Yes | Select the request type (see full list below) |
| Reference | Conditional | Appears based on Type. Select the linked PO or Work Order if applicable. |
| Amount | Yes | Enter as a fixed Rs amount or as a percentage (see below) |
| Due Date | Yes | When the payment is expected or required |
| Notes | No | Context for the approver (e.g. “Mobilisation advance per contract clause 4.2”) |
| Upload Files | No | Attach supporting documents such as quotations, approvals, or references |
Step 2: Select the Request Type
Click the Type dropdown and select the type that best matches the purpose of the payment:
| Type | When to Use |
|---|---|
| Advance against PO | Advance payment to a supplier linked to a specific Purchase Order |
| Advance against Subcon Work Order | Advance payment to a subcontractor linked to a specific work order |
| Advance against BOQ | Advance against the project’s BOQ scope |
| Advance against Material Purchase | Advance for material procurement not yet in a formal PO |
| Advance against Subcon Expense | Advance for subcontractor-related expenses |
| Advance against Other Expense | Advance for other project expenses |
| Advance for Labour | Advance or payment for labour contractors |
| Petty Cash | Small cash requests for site expenses |
| Other | Any request that does not fit the categories above |
When you select a type linked to a specific document (e.g. Advance against PO), a Select PO field appears. Choose the relevant PO from the list. The PO value is shown as a reference for the amount calculation.
💡 Always select the correct type. Advance against PO links the payment to the PO ledger. Petty Cash goes to a different expense category. Selecting Other removes the linkage to any document and makes tracking harder.
Step 3: Enter the Amount
The Amount field has a toggle next to it:
| Mode | How It Works |
|---|---|
| Rs (default) | Enter a fixed rupee amount directly |
| % | Enter a percentage. The system calculates the rupee amount automatically based on the linked reference value (e.g. 20% of a Rs 1,32,000 PO = Rs 26,400, shown below the field) |
Use % mode when your company policy specifies advances as a percentage of the contract or PO value. This removes manual calculation errors.
Step 4: Save the Request
Click Save.
The request appears in the Payment Requests list with status UNPAID and enters the approval queue. The Pending Approvals badge in the top bar updates for the relevant approver.
Step 5: Approval
After the request is saved, it waits for approval based on the Multi-Level Approval rules configured for Payment Requests in Settings.
| Role | What Happens |
|---|---|
| Admin | May have auto-approval depending on configuration |
| Approver roles | Receive a notification and see the request in Pending Approvals |
| Requestor | Can see the status in the Payment Requests list |
The approver opens Pending Approvals, reviews the request details, and approves or rejects it. If there are multiple approval levels, each must approve in sequence.
Once all levels have approved, the Record Payment button becomes available on the request.
💡 If the Record Payment button is not visible, the request has not yet received all required approvals. Check the Pending Approvals queue to see where it is in the approval chain.
Step 6: Record the Payment
Once approved, click the row for the relevant request in the Payment Requests list.
The request detail panel opens, showing Request No., party, amount, due date, type, and linked reference.
Click Record Payment.
A Payment Out form opens pre-filled from the request:
| Field | What to Enter |
|---|---|
| Date | Auto-filled with today’s date. Edit if needed. |
| Party | Auto-filled from the payment request |
| Amount Given | Auto-filled from the request amount |
| Description | Optional. Add a payment note. |
| Reference No. | Optional. Cheque number, NEFT reference, or transaction ID. |
| Payment Method | Cash, Bank Transfer, or Cheque |
| Add Cost Code | Optional. Assign to a budget cost code. |
| Upload Files | Attach payment proof such as a receipt or bank screenshot. |
Click Save.
What Happens After Recording the Payment
| Item | What Updates |
|---|---|
| Payment Request status | Changes from UNPAID to PAID |
| Transaction tab | A Payment Out entry is created in the project’s Transactions list |
| Party ledger | The party’s To Pay balance decreases by the payment amount |
| Linked document | The linked PO or Work Order records the advance against it |
Alternative Route — Create a Payment Request from a Subcontractor Work Order
Payment Requests can also be raised directly from inside a Subcontractor Work Order without going to the Transaction tab first.
- Open the project and go to the Subcontractor section
- Open the relevant Work Order
- Click the Items tab inside the Work Order
- Click + Payment Request
- Fill in the form as above. The type pre-fills as “Advance against Subcon Work Order” and the work order is pre-linked.
The request created this way appears in the same Payment Requests list under the Transaction tab. Both routes create the same record.
Tips
- Use % mode for PO advances when your company policy specifies a standard advance percentage (e.g. 20% on all POs). The system calculates the exact amount from the PO value and removes the need for manual calculation.
- Always add a note in the Notes field. Approvers who receive requests without context often delay approval or reject and ask for details. A one-line note (e.g. “Labour advance for foundation work, Week 3”) speeds up approvals significantly.
- Set a realistic Due Date. Requests approaching their due date can be flagged and prioritised in the approval queue.
- Payment Requests are separate from direct Payment Outs. If a bill already exists and you want to pay it immediately without a formal approval step, use a Payment Out from the Transaction tab directly. See How to Record a Payment and Settle Outstanding Bills.
- PRs raised from the Subcon Work Order and PRs raised from the Transaction tab are the same record. Use whichever starting point is faster based on where you are in the app.
- If Multi-Level Approval is not configured for Payment Requests, requests may be auto-approved and the Record Payment button appears immediately after saving.
If Something Goes Wrong
| Problem | Likely Cause | What to Do |
|---|---|---|
| Party not appearing in search | Party not added to the project | Go to the Party tab and add the party to the project first |
| Select PO list is empty | No POs exist for this party in this project | Create the Purchase Order first via Procurement, then return to create the PR |
| % amount not calculating | Linked reference not selected yet | Select the PO or Work Order first, then enter the percentage |
| Record Payment button not visible | Request not yet fully approved | Check the Pending Approvals queue to see which approval level is pending |
| Payment Request not showing in the list | Not saved correctly | Re-create the request and check that Amount and Due Date are filled before saving |
| Status still UNPAID after recording payment | Payment Out not saved completely | Re-open the PR, click Record Payment, fill in all required fields, and click Save |
| PR created with wrong type | Saved before selecting the correct type | If still UNPAID, edit the PR to correct the type. If PAID, it cannot be edited — create a correcting entry and note the error. |
| Approver cannot see the request in Pending Approvals | Multi-Level Approval not configured for Payment Requests | Go to Settings, then Multi-Level Approval, and set up rules for the Payment Request document type |
| Party ledger not updating after payment | App not refreshed | Reload the page and check the party balance in the Party tab |