Work Hours
Monday to Friday: 7AM - 7PM
Weekend: 10AM - 5PM
Pointing in Construction: Types, Benefits, & Process
Filling and closing the gaps between bricks or stones in a masonry wall is a vital step in the construction process known as pointing. Pointing not only enhances the appearance of the wall but also significantly slows down the deterioration of the joints. We will discuss the many forms of pointing, their advantages, and the detailed procedure in this blog.
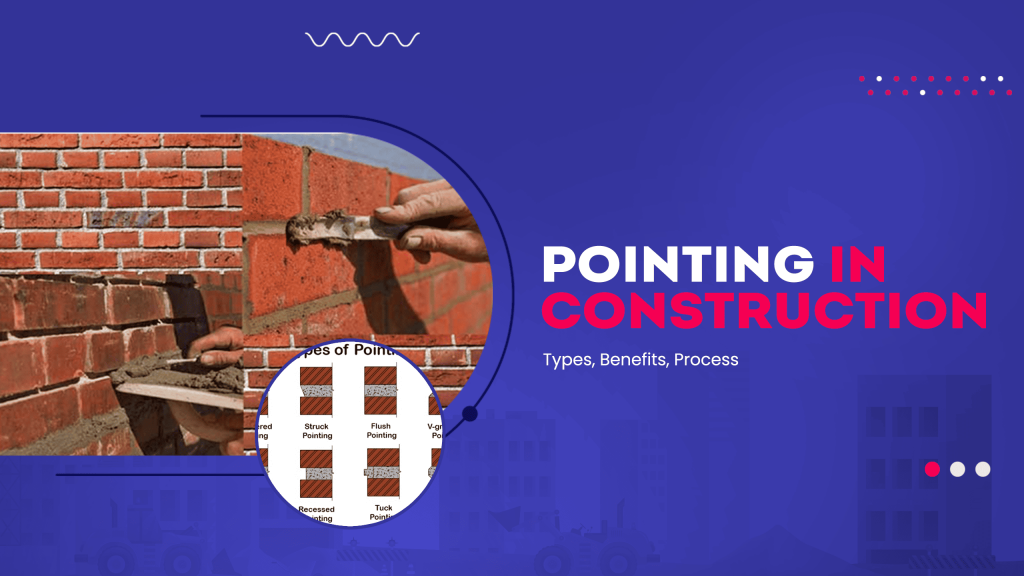
Types of Pointing in Construction
1- Flush Pointing
Pointing in a flush direction is the most typical form of the gesture. To do this, first, the gaps between the masonry pieces are filled in with mortar, and then the mortar is smoothed out until it is flush with the surface of the wall.
2- Tuck Pointing
Tuck pointing is a style of pointing in which the mortar is forced into the joints, and then finished off with a pointed tool to create a concave indentation. This sort of indentation looks like a tuck. The joints in a masonry wall are frequently brought attention to with the use of this form of pointing.
3- Beaded Pointing
Beaded pointing is a sort of pointing in which the mortar is forced into the joints and then finished off with a pointed instrument to create a convex indentation. This type of pointing is also known as “beading.” In order to create a seal that is impervious to water and protect the margins of masonry units, this sort of pointing is frequently utilized.
4- Weathered Pointing
A style of pointing known as weathered pointing is carried out by letting the mortar deteriorate in its natural environment. This particular style of pointing produces a weathered look while also providing some degree of protection from the elements for the brick wall.
5- Keyed Pointing
Keyed pointing is a sort of pointing in which the mortar is forced into the joints and then scored with a pointed instrument to create a series of keyways. This type of pointing is also known as keyed mortaring. These keyways play an important role in locking the masonry pieces together, which ultimately results in a stronger joint.
6- V-grooved Pointing
V-grooved pointing is a sort of pointing in which the mortar is forced into the joints and then scored with a pointed instrument to create a V-shaped groove. This type of pointing is also known as “V-grooved pointing.” On stone walls, this particular kind of pointing is frequently utilized to create a decorative accent that stands out.
7- Recessed Pointing
A style of pointing known as recessed pointing involves pressing mortar into the joints of a wall and then recessing some of that mortar below the surface of the wall. This particular style of pointing can serve to create an appearance that is more pleasing to the eye, and it can also assist in shielding the brick wall from the effects of the outside environment.
Also Read: 5 Important Soil Tests for Construction Every Contractor Should Know
Advantages of Pointing in Construction
1- Protection from Weathering
One of the main benefits of pointing is that it helps to prevent weather-related damage to the joints. Pointing stops water, snow, and wind from entering the fissures in the wall, lowering the possibility of cracks and collapsing.
2- Improved Appearance
Pointing significantly raises a stone wall’s aesthetic value. By filling in the spaces between the bricks or stones, it produces a surface that is homogeneous and smooth. A unified and visually beautiful wall is the end product.
3- Increased Durability
A masonry wall’s durability is improved by effective pointing. Pointing stops water and moisture from penetrating the wall by sealing the joints. As a result, there is a lower chance of structural issues including corrosion, erosion, and weak foundations.
The procedure of Pointing in Construction
1- Removal of Old Pointing
Using a chisel or power tool, old pointing is removed as the initial stage in the pointing procedure. To protect the bricks or stones, this should be done with caution.
Rake out the joints and clean them well after removing the old pointing. To clear away dirt and make sure the surface is clean, use a wire brush or other suitable instruments. Then, using a pointed trowel, rake out the joints to a depth of 10-15mm.
2- Application and Mixing of Pointing Mortar
Follow the manufacturer’s directions for mixing and applying pointing mortar. Make sure the mixture is stable and effective. Using a pointed trowel, apply the mortar to the joints, pressing it firmly into the crevices.
Conclusion
Pointing is a crucial step in building that has many advantages, including improved aesthetics, increased durability, and weatherproofing. Following the right steps is essential to getting a successful result whether you use cement or lime pointing. You can confidently embark on pointing projects to preserve and improve the integrity and aesthetics of your brick walls if you are aware of the many forms of pointing, their benefits, and the step-by-step technique.